Pattern Writing Series – Paper Piecing

Violin Quilt Pattern | Whims And Fancies

Before I start talking about anything else, I want to thank everyone for linking up on Wandering Camera and leaving such wonderful comments.  It was a great start to the monthly linky party and I really appreciate it.

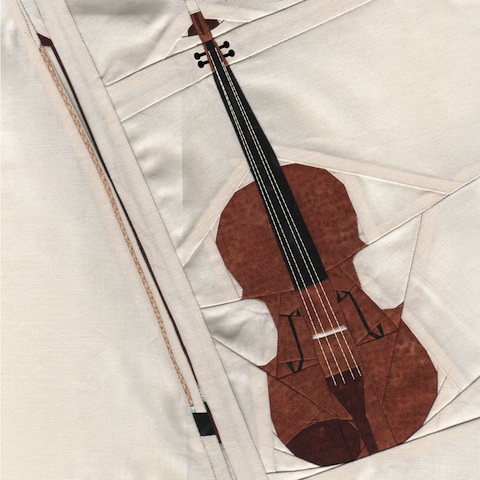
As you know, I love making pictures into quilts.  The design ideas come from all aspects of my life.  For example, I started making the music instruments patterns with this violin because I play the violin.

When I started in 2012, I didn’t know a thing about quilting.  I had seen pictorial blocks made using foundation/paper piecing and I really wanted to make them.  I was addicted and I became a paper piecing designer.


When Cheryl started the Pattern Writing Series at Meadow Mist Designs, I was going to write a few lines about paper piecing as part of the weekly round table discussion.  As I started writing I found out that there are quite a few reasons why I prefer paper piecing over regular piecing.   Cheryl and I thought it would be great to write a post about it with a few examples.


First and foremost, PP gives me the freedom of turning any picture I wish to make into a quilt block. A lot of the times, I don’t see the designs I really want depicted in fabrics. I can make my custom “fabrics”, if you will, using this technique.

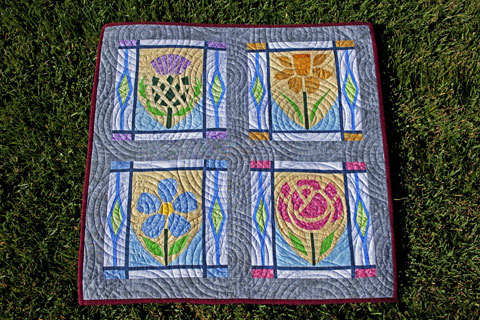
Raindrops On Flowers is the first set of stained-glass-inspired designs I made depicting the flowers of the United Kingdom.


Squares Plus Quilt Pattern | Whims And FanciesI am not the world’s most patient person when it comes to repetitive processes.  I simply lose patience when I have to repeatedly cut all the pieces ahead of time. I want to get to sewing as fast as I can.  If you are like me, you might also find PP advantageous.

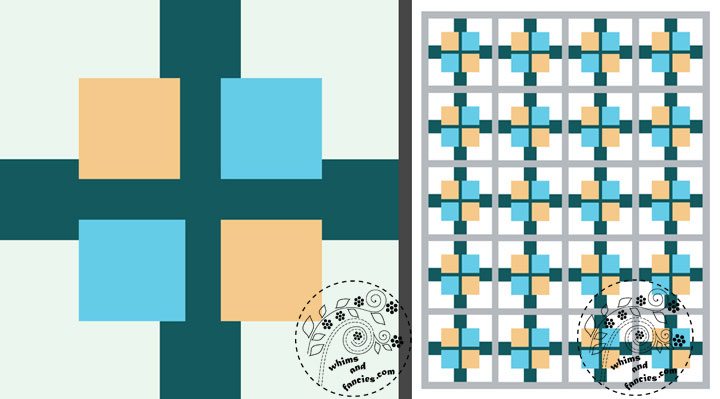
Although I included the instructions for both regular AND paper piecing in my new pattern Squares Plus, you can be sure that I will be using the PP method for my quilt.


Nordic Star Quilt Pattern | Whims And Fancies

Cutting all the pieces ahead of time seems very daunting to me. If I repeat a mistake while cutting my fabrics, then I have wasted a lot of fabric and I have to repeat the process. With PP I can cut and sew as I go. If I make a mistake, then I have wasted only a little.

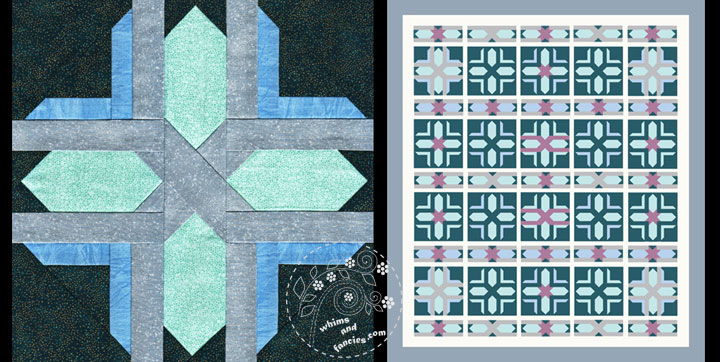
I added a lot of colour variations in my Twilight Star quilt layout.  The fabrics I picked for this quilt are out of production, so I rather make the blocks one at a time to avoid repeating cutting mistakes.


Purple Star Quilt Pattern | Whims And Fancies

On a side note, I hear a lot of times that PP wastes a lot of fabric. With time and practice, you can actually minimize waste down to just trims. If I am going to make multiple blocks from a pattern, I usually print an extra copy of the pattern. I cut the pieces out and use them as templates to cut my fabric.  That is how I made this quilt.


Flying Geese And Star Quilt Pattern | Whims And Fancies

It is easier to sew complex patterns by converting them to PP patterns. Following numbers and letters is very much like painting by numbers.  I enjoy the challenge of trying to define shapes with minimum amount of seam alignment to make it easier to sew for myself or anyone else making the block.

It was fun to design the star block with flying geese on this Geese Around The Sun wall hanging.


Camera Quilt Pattern | Whims and Fancies

I like PP over appliqué because there are no raw edges with PP. I also don’t have to pseudo-FMQ to sew the appliqué pieces. Straight line sewing is all I need.

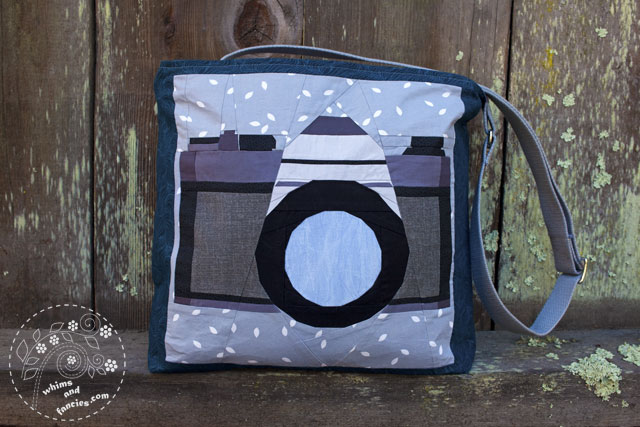
This travel bag gets roughed up quite a lot and goes though a lot of washing, so raw edges was not an option.  Even though I have another pattern that uses an appliqué lens, I used the PP version for my bag.


Greek Letters Quilt Pattern | Whims And Fancies

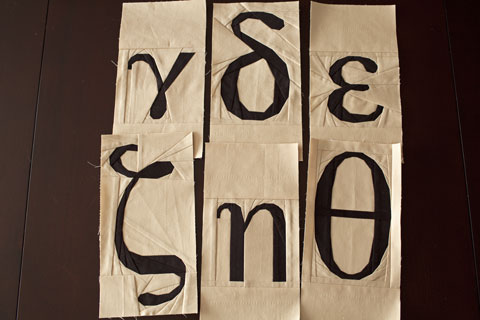
Curves are quite easy to replicate with PP even though they are made of straight lines.  All the script letters in my To Hellenikon quilt are made using paper piecing.


Pinwheel Quilt Pattern | Whims And Fancies

This last one is a big one for me. With PP I can get crisp and perfect corners and lines every time. You don’t have to be efficient with scant quarter inch seam. If you can sew on the line, you will get a perfect block every time.

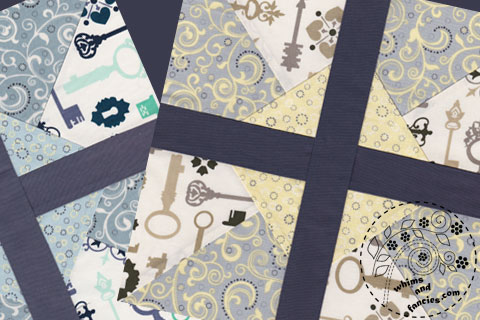
My HST-s always come up a little smaller than the correct size.  In my new WIP I chose to use PP on this simple block because I didn’t want to worry about scant quarter inch seam every time to get the right size.


There you have it!  Paper piecing is how and why I started quilting and it will always be my first preference.  There are limitless possibilities with paper piecing and I really cherish it.

Many Thanks to Cheryl for including me in the Pattern Writing Series and letting me write this post.  I enjoyed sharing this with you. Please visit Meadow Mist Designs for more insight into pattern writing, Cheryl is doing a wonderful job with it.

Happy Quilting,
-Soma


Leave a comment


Wandering Camera – February Linky Party

Camera And Photo Linky Party

Welcome to the first Wandering Camera linky party! I want to thank all of you for your encouraging words about my photos that I have shared lately.  I continue to practice and learn.  That’s why earlier this year I decided to officially take at least one photo per day. On the first Thursday of every month I will share my photos from the previous month and invite you to share your posts through this monthly linky party.

Without further ado, here are my photos from the month of January.  They are in chronological order, 1st – 31st of January.


Photo Linky Party | Whims And Fancies

1. Silhouette of our neighbour’s tree against the evening sky

2.  The same tree reminds me of the Whomping Willow from Harry Potter

3. Sticky toffee pudding (told you it’s my favourite!)

4.  An old plant that has been with us forever, surviving every move


Photo Linky Party | Whims And Fancies

5. Suspended raindrop

6. Homemade bread

7. Passing wind turbines during a road trip

8. Snow in the Sierras


Photo Linky Party | Whims And Fancies

9. Cloud from an overcast day settling into the Yosemite Valley

10. A lovely morning at Yosemite

11. My muddy car after the trip.  This happens after every trip

12.  First day back at work with Charlie


Photo Linky Party | Whims And Fancies

13. I wanted to see the rain, Mr. Treestone wanted to play, so I obliged

14. A fallen flower for Alan Rickman

15. Sign for a place with comforting food

16. A tangled tree in the park


17. Spotted these lights in between two buildings while walking in the rain

18.  Old train carriages turned into shops

19. Montague is fascinated by the rain

20. My husband loves this tree in the park


21. A Hungarian Horntail dragon that I painted years ago

22. A Willow at dusk

23. Off to the mountains again

24. Black oaks, with El Capitan towering over them


25. Cathedral Rocks and a frozen pool

26. The only flower blooming on a plant

27. Inky branch against an early evening sky

28.  From the overpass in our little town


29. Napa Opera House

30. Victorian Houses in San Francisco

31. Inked Victorian house

 
It was a good start to my year-long project.  A lot of these photos were taken in low light because light was already fading by the time I went out for a walk.  Some days it was raining so hard that it was dark by mid-day.  That would never stop me from taking pictures, however.

You may not be able to take quilt photos outside while it’s raining, but you can take photos of almost everything else.  I think understanding light is the key to photography, so I would like to start my series of photography tips with that.

1. Change of light with seasons –

  • The Sun shifts northward after the Vernal Equinox in March and southward after the Autumnal Equinox in September.
  • If you have a favourite spot that you like to use for photographing your crafts, you will notice that the light shifts from that spot as the seasons change.  While the same spot might get dazzling light at 4:30 in the afternoon during summer months, the light is barely there after 2:30 PM during winter months.
  • The above is true even for cloudy days.  The amount of maximum light changes with the seasons.
  • You want to make a mental note of the times of maximum light during every season.  That way you won’t miss a photo opportunity before the light moves away from that spot.

2. Morning and evening light –

  • It is also good to know your preference for morning or afternoon light since they are quite different.  Morning light is much cleaner, softer and calmer.
  • Afternoon light tends to warm everything up, almost glowing, more orange.  Unless I am looking to capture the afternoon glow reflected off a mountain for example, or taking a photo of a sunset, I generally prefer morning light when I can get it.
  • You really want to avoid outdoor photography around mid-day at all cost.  The Sun is right above you and everything looks extremely washed out.  Try not to take photos of sunlit areas.  You can take photos in shadowy spots, perhaps under a tree, and let it filter the light.

3.  Indirect and diffused light

  • You know this one already, but I will mention it anyway – don’t use direct sunlight when you are photographing your crafts or any other object.  Always take the photo where there is the most light, but not direct sunlight.
  • If you decide to take indoor photos beside a window with direct sunlight, use sheers to diffuse the light.  It makes for a beautiful backdrop.  A few rays of light that come through are softened by the sheers, adding interest to your photo.
  • You can have a wonderful play of light and shadow on your photos by letting soft light touch parts of the surface, but never all of it.  You want to use morning or afternoon light for these photos as well.

4. Artificial light

  • Use a stand for your camera with a low shutter speed.  Only use the flash if it actually enhances the colours.  I am keeping this one short because I will talk more about night-time and low-light photography in a separate post.

 
I hope you found this information helpful.  It takes practice to capture light with your camera the way you intend to show it.  Play with your camera and note what works and, most importantly, what doesn’t work.


Pinwheel Quilt Pattern | Whims And Fancies


Lastly, since it has been a while I shared something quilt-related, I couldn’t help but share this little work in progress quilt photo with you.


That’s all I have for today.  Now it’s your turn to share your photo posts.  I am really looking forward to seeing them.  Every photo is special because it suspends a moment and everyone sees the world around us differently!  So don’t compare and contrast, just have fun and see the world that only your eyes can see!
 

Badge to share on your post and website

Camera And Photography Linky Party | Whims And Fancies


You can add any number of links to your posts from the previous month.  The posts should have photos in them, with a story or anecdote. Your project photos (quilting, sewing, painting, knitting, etc.) are most welcome.  You can also write a new post to link up.  Please do not link up posts that are older than the previous month, they will be removed.

Please include the badge or a text link back to this site on each post that you link up.  You can also add the badge to your blog. I am happy either way as long as you link back :-)

Spread a little encouragement amongst each other.

I will leave the link-up open for a whole week.

Wandering Camera is a monthly event that will run on the first Thursday of every month.  The next post and link-up will be on the 3rd of March.  If you follow me via email, bloglovin or facebook, you will get a reminder.

Have fun!!


-Soma


Leave a comment


error: Content is protected !!